Introduction
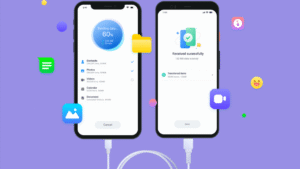
Switching from Android to iPhone is an exciting move, but one major concern most users have is how to transfer contacts from Android to iPhone without losing important data. Contacts are among the most valuable pieces of information on your device — including phone numbers, emails, and other details that you can’t afford to lose.
Luckily, transferring your contacts is easier than ever in 2025, thanks to improved apps, cloud services, and iOS features. Whether you’re using a Google account, Apple’s built-in tools, or third-party apps, this guide will walk you through every method step by step.
Why It Matters
Moving your contacts ensures:
- Seamless communication from day one on your new iPhone
- Avoidance of manual entry or lost information
- A smoother transition across operating systems
- No need to re-add every friend, family member, or work contact
Let’s look at the best and safest methods to get your contacts from Android to iPhone in 2025.
1. Transfer Contacts Using Apple’s Move to iOS App (Recommended for New iPhones)
Why It Matters:
This is the official Apple method designed specifically for Android users switching to iPhone. It moves contacts, messages, photos, and more during iPhone setup.
Requirements:
- Android phone (running Android 6.0 or later)
- iPhone (new or factory reset)
- Wi-Fi connection
- “Move to iOS” app (free on Google Play)
Steps:
- Install Move to iOS on Android:
- Go to the Google Play Store and search for Move to iOS.
- Install and open the app.
- Set Up Your iPhone:
- Start setting up your new iPhone.
- When you reach the Apps & Data screen, choose Move Data from Android.
- Connect Devices:
- A 6-digit or 10-digit code will appear on your iPhone.
- Enter the code on your Android device.
- Choose What to Transfer:
- Select Contacts (and any other data you want).
- Tap Next to begin the transfer.
- Complete Setup:
- Once the transfer finishes, continue setting up your iPhone.
✅ Tip: This method only works during initial iPhone setup. If you’ve already set up your iPhone, use one of the other methods below.
2. Transfer Contacts Using Google Account Sync (Cloud-Based Method)
Why It Matters:
If you use a Google account to back up contacts on Android, you can sync them directly to iPhone by simply signing in.
Steps:
- On Your Android Phone:
- Go to Settings > Accounts > Google.
- Tap your Google account and make sure Contacts is toggled on for sync.
- On Your iPhone:
- Go to Settings > Mail > Accounts > Add Account > Google.
- Log in with your Google account.
- Toggle Contacts ON when prompted.
- Check the Contacts App:
- Open the Contacts app on your iPhone to verify the imported list.
🔄 Tip: Google-synced contacts update automatically across devices.
3. Use a VCF (vCard) File to Manually Transfer Contacts
Why It Matters:
Great for users who prefer not to use cloud services or third-party apps.
Steps:
- Export Contacts on Android:
- Open the Contacts app.
- Tap the three-dot menu > Export.
- Export to .vcf file and save it to your phone storage.
- Transfer VCF File to iPhone:
- Send the .vcf file via email or upload it to iCloud Drive.
- Import to iPhone:
- On your iPhone, open the email or file.
- Tap the .vcf file and choose Add all contacts when prompted.
📦 Tip: This method is best for small or moderate contact lists.
4. Sync Contacts Using iCloud (Post-Transfer Cloud Management)
Why It Matters:
After importing contacts, iCloud can keep them updated across your Apple devices.
Steps:
- On Your iPhone:
- Go to Settings > [Your Name] > iCloud.
- Toggle Contacts ON.
- Check Online:
- Visit iCloud.com to view or edit contacts anytime.
🔐 Note: Make sure to back up before syncing to avoid duplicates or data loss.
5. Transfer Contacts Using SIM Card (For Older Devices)
Why It Matters:
This traditional method works well for basic contact transfer without cloud access.
Steps:
- Export to SIM on Android:
- Go to Contacts > Settings > Export to SIM.
- Insert SIM into iPhone:
- Power off both phones.
- Insert the Android SIM into the iPhone.
- Import Contacts on iPhone:
- Go to Settings > Contacts > Import SIM Contacts.
🧠 Tip: Some contacts may not transfer if they contain more than basic info (like photos or multiple numbers).
6. Use Third-Party Apps for Contact Transfer
Why It Matters:
These apps can help if the official methods don’t work or you want to transfer other data types alongside contacts.
Popular Apps:
- Copy My Data (by Media Mushroom)
- Send Anywhere
- SHAREit
General Steps:
- Install the app on both Android and iPhone.
- Connect devices via Wi-Fi or hotspot.
- Choose Contacts to transfer.
- Accept the request on iPhone and complete the process.
⚠️ Always read app reviews and permissions before installation.
7. Transfer Contacts via Email (Single or Few Contacts)
Why It Matters:
Ideal for moving a handful of contacts manually.
Steps:
- On Android, open the Contacts app.
- Select a contact > tap Share > choose Email.
- Send it to your iPhone’s email.
- Open the email on iPhone and tap Add to Contacts.
8. Troubleshooting Common Issues
✅ Contacts Didn’t Show on iPhone?
- Ensure Contacts is toggled ON in iCloud or Google settings.
- Check the default account under Settings > Contacts.
✅ Duplicates After Transfer?
- Use iCloud.com or apps like Cleaner – Merge Duplicate Contacts.
✅ Contact Photos Missing?
- Only certain methods retain contact photos. Try Move to iOS or Google Sync for best results.
9. Tips for a Smooth Contact Transfer
- Back up contacts on Android before starting
- Avoid multiple sync sources to prevent duplicates
- Reset iPhone if you want to start fresh (Settings > General > Transfer or Reset iPhone)
- Verify after import by calling or texting key contacts
10. Which Method Should You Choose?
| Method | Best For |
|---|---|
| Move to iOS | New iPhone users |
| Google Sync | Cloud users & Gmail contacts |
| VCF File | Offline/manual transfer |
| SIM Card | Basic/limited contact transfer |
| Third-party Apps | Transferring multiple data types |
| Individual contact transfers |
Conclusion
Transferring contacts from Android to iPhone no longer has to be a complicated or frustrating process. Whether you prefer Apple’s Move to iOS, rely on Google Sync, or go old-school with a SIM card, the methods above ensure your digital address book follows you.
Just pick the method that suits your situation and comfort level, and you’ll be set up on your new iPhone in minutes — with all your contacts ready to go.
- Best Technology Blogs to Follow in 2025 - July 7, 2025
- Top FMovies Alternatives for Free & Legal Streaming in 2025 - July 6, 2025
- How to Disable Gemini: A Step-by-Step Guide - July 6, 2025
Discover more from Techy247
Subscribe to get the latest posts sent to your email.


